HOW TO: Host and Build Your Own WordPress Blog -- Part 2
|
|

|
| 2.8/5.0 (4 votes total) |
|
|
|
|
Dre Armeda
June 22, 2009
|
Your new domain name and hosting account is all set up. What now?
Now we get to the meat and potato’s. You now have your domain
sitting on your hosting account. It’s time to get WordPress downloaded,
uploaded to your server, and installed. You’ll know what I mean by the
time you are done reading this post.
I initially wanted to create a post that went from registering your
domain name, to installing WordPress, to publishing your first post. It
became apparent quickly that it would be better to segment the HOW TO
into multiple posts. This is the second post in the series, and the
follow on will include plugin installation, theme upload, and WordPress
personalization.

The great thing about WordPress is its following. If it exists in
WordPress, it has probably been written about. Using your resources
along the way, will help make anything possible.
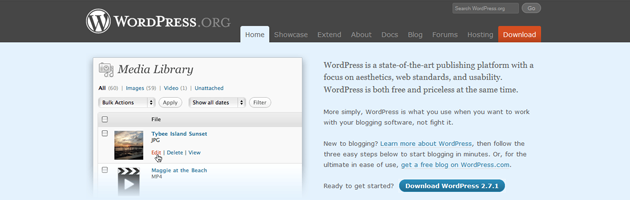
1. Download WordPress
Not everyone is geeky The objective of this post is to show you that
it’s fairly easy to get a small, manageable website up and running.
Lets head over to Wordpress.org and download the latest version of WordPress.
Make sure to save the compressed folder somewhere you remember. I
typically create a directory on my desktop with the name of the project
so I can keep everything organized in one place.
The file will need to be uncompressed, your Operating System should be able to do the job. If not, I recommend you get 7-Zip loaded. It’s free and simple to use.
2. Upload WordPress
Most hosts offer install scripts like Fantastico that will auto
install software like WordPress very quickly. Although this is an
option, I personally do manual installations and recommend you do so as
well.
As you start the process of getting your WordPress site set up, you
will be spending some good time logged into your server. You’ll be
managing files, adding themes, and uploading images. A lot of these
tasks can now be done via the WordPress administration panel but there
are a few things that still need to be done via Secure Shell (SSH) or
File Transfer Protocol (FTP). We will be going over using FTP to get
your files where they need to be.
There are various FTP programs out there, some free, some quite expensive, all with similar features. I recommend FileZilla, as it is free and will do everything you need to manage your website files and directories via FTP.
So now you have your FTP program locked and loaded, it’s time to push your files up to your host.
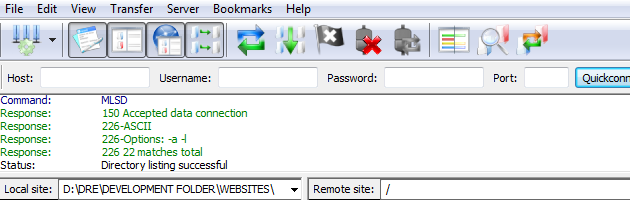
Your host, will provide you with credentials and FTP configuration
settings. Typically you will need to know the hostname (web address),
Username, Password, and default directory. Once you get the correct
information from your host, input the info into your client and test
your connection to the server
If you can’t get connected to the server properly, contact your host, they should have documentation to help you out.
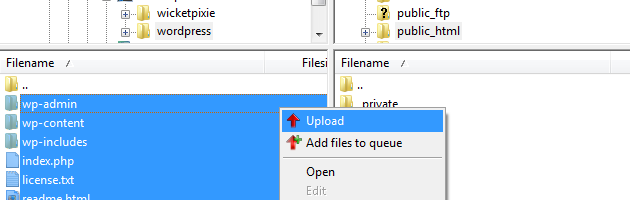
For the rest of you, now that you’re logged in, it’s time to upload
your files to the proper directories. Navigate through your server to
the place you want to install WordPress. Upload all of the files and
directories that came with the WordPress download (i.e.
http://armeda.com/ or http://armeda.com/blog). Depending on the type of
site the location will vary. I typically install in the root directory
but again, this will vary based on your needs and likes.
3. Create Database
As with the WordPress automatic installation that some hosts offer,
the database creation can also be automated with scripts like
Fantastico. Again, I prefer to manually create all needed components.
Every host will have a slightly variated way to create a database
but most are similar. There are a few things you have to accomplish
here when creating the WordPress ready database:
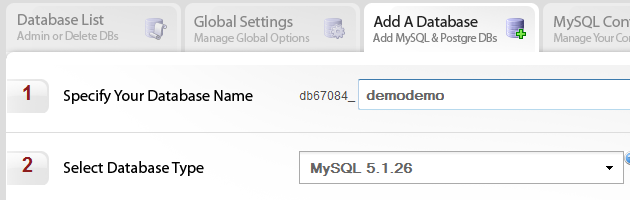
Create Database
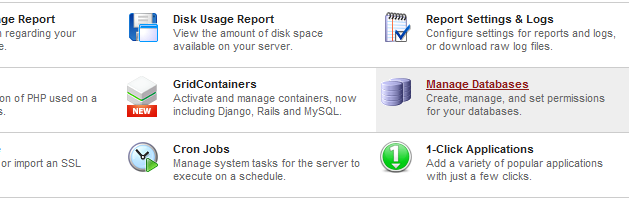
Most hosts have an administration panel with a Database creation
page, CPanel is a very popular Web-Admin Panel. I am a Media Temple guy
and they have their own. Head over to the page and create a database,
give it whatever name you like. I name my databases according to their
use, makes it easier to remember.
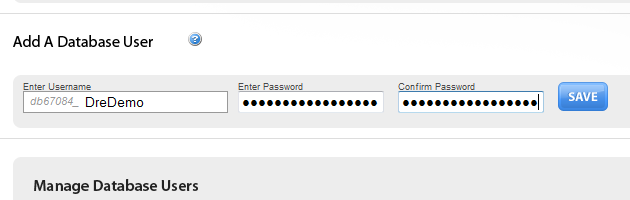
Create Database User
Now your database is created but you can’t do anything with it
without creating a database user that can use the database. Again
choose the name of your choice and add the user.
Add User to Database
The database is ready, now you have a user, you need to associate
them and give the user the appropriate permissions to access and use
the database. Make sure to give the user read and write permissions,
some database management pages will give you more options, give the
user full rights if asked.
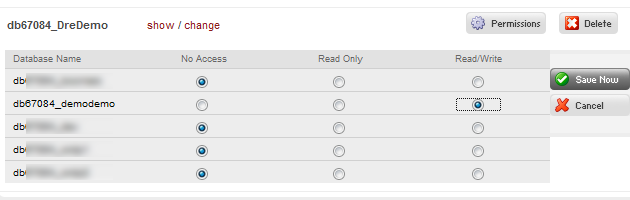
Take note of the database name, user name, and the password. You will need it during the Wordpress installation process.
4. Install WordPress
It’s all smooth riding from here. You have all the files you need,
your database is ready to go, so let’s get cooking on a WordPress
installation.
Open up your browser of choice. Do you remember where you uploaded
your WordPress files and directories? (i.e. http://armeda.com/ or
http://armeda.com/blog) Type in the URL and you’ll be prompted through
the Famous 5 Minute Install.
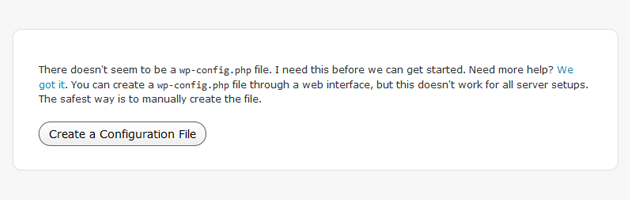
Some servers require you to enter all of your settings into a
configuration file. If you go to the WordPress download folder, you
will find a file named wp-config-sample.php. Add your database and
database user information into that file and save as wp-config.php.
Open up your FTP client and upload the file.
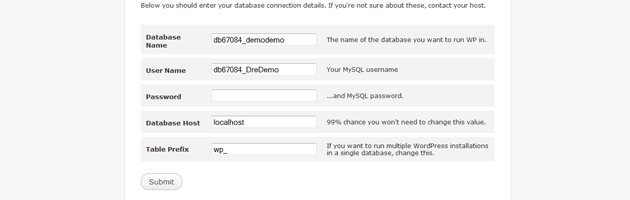
In any case, the web interface configuration works for most
installations just fine. At this point you enter all of your database
and database user information.
Once your database information is entered in the web interface or
straight into wp-config.php, you will receive a Welcome screen asking
for you to give your blog a name.
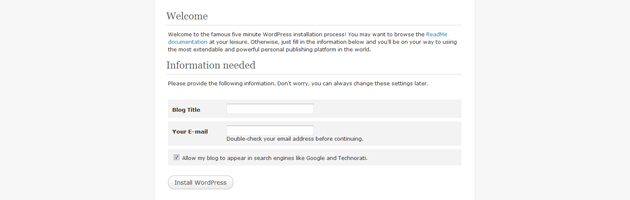
This is one of the last steps and now you are only moments away from
logging into your WordPress admin area for the first time. Once you
enter your Blog title and email address, you will be taken to a page
that shows you your admin password. Make sure to keep that in a safe
place, then click the log in button.
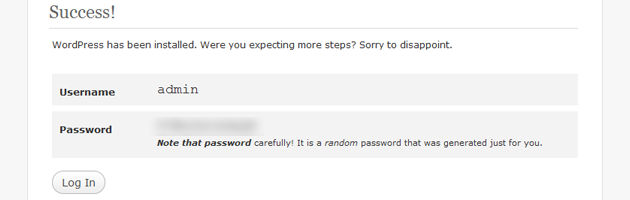
That’s it. You just installed WordPress. It’s time to login for the first time

Now wasn’t that easy? The neat thing is there are various ways to
get to the same place, it’s a matter of getting comfortable with the
various processes and using what is best in your situation
There you have it. So far in the series, you have registered a
domain name, purchased hosting, you’ve learned how to FTP files to a
server, create a MySQL database, and install WordPress on your server.
Stay tuned for the next post in the series which will cover plugin
installation, theme upload, and how to personalize your blog.
If you or anyone you know is in need of professional WordPress or Web help for that matter, don’t hesitate to contact me.
| 


 FEEDBACK
 COMMENTS
 PRINT
PRINT SUBMIT ARTICLE
 RSS
RSS